


eikeboom
Race Dog
I think I have solved the problem of the KLE500's backside being eaten by the back tyre.
Maybe this belongs under the Pooratech Thread, or the KLE Apppreciation Group, but here goes:
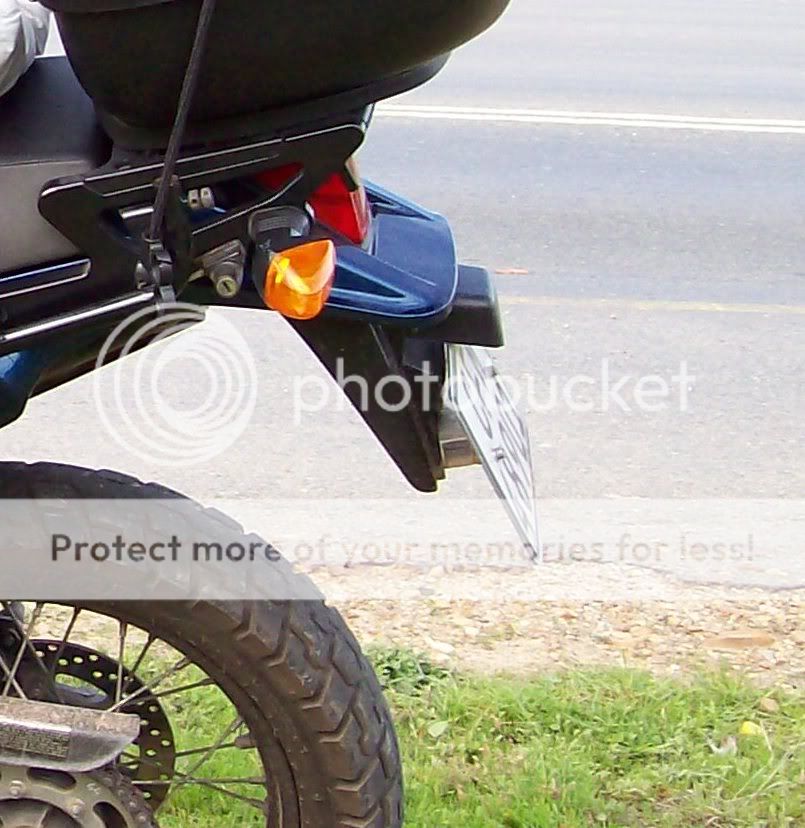
The problem is that the plastic mud guard is fairly flexible, especially with the added mass of the number plate mounted right at the bottom - so there is a lot of flex in the system. Together with the soft suspension, the result is that tyre and number plate meet each other on corrugated roads and when you go fast through low drifts and over bumps, as is the way to go of course. Most of the KLE’s I’ve seen do this.
After I lost the second or third number plate I mounted the next one higher up and at an angle further away from the wheel, using a piece of aluminium tubing. That helped only a little.
Later I made a steel bracket to angle the number plate even further away, bolting it to the inside of the mud guard where the number plate light is fitted. The added weight and leverage quickly tore the mud guard, and to my dismay even the painted tail piece started to crack up.
Refusing to change my riding style or keeping off dirt, I had to make a drastic change to the hardware.
These two pictures show the before and after:
and
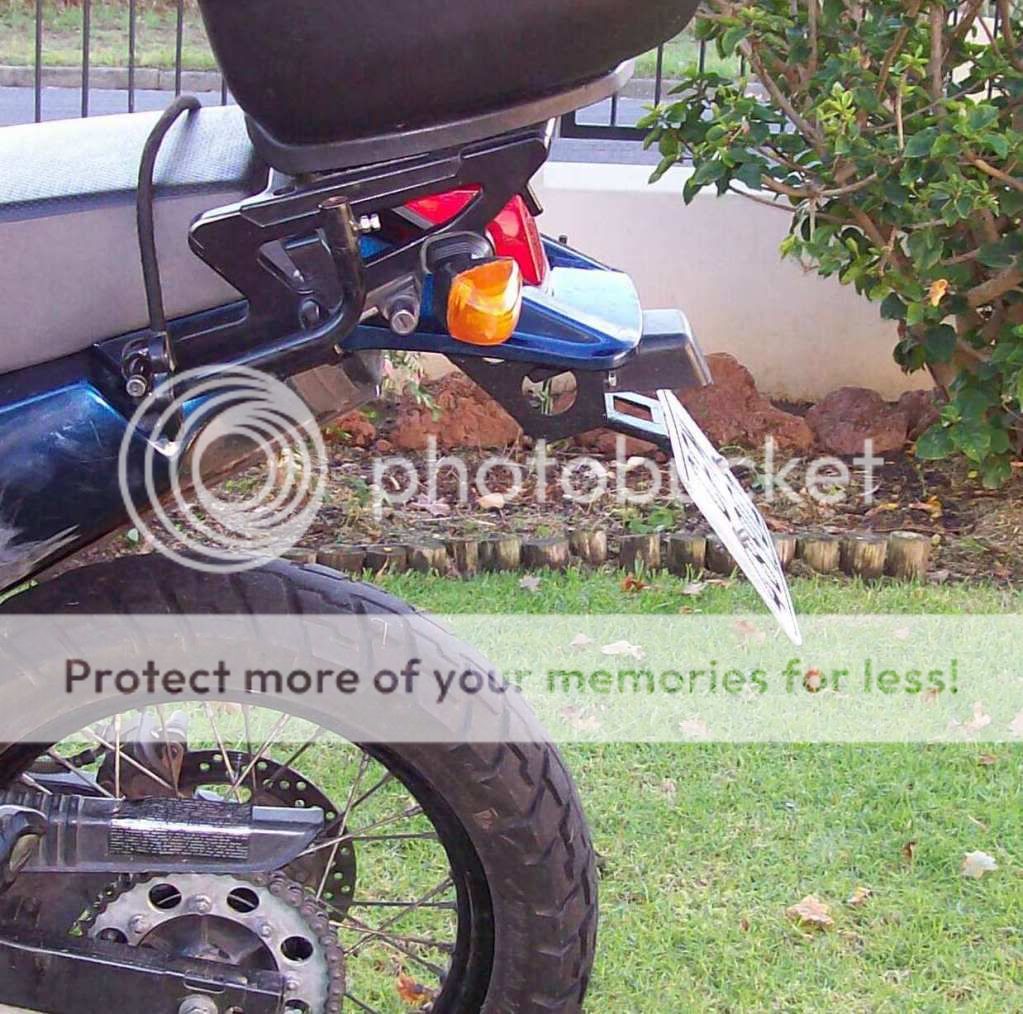
The change to the backside is subtle. Nothing extravagant.
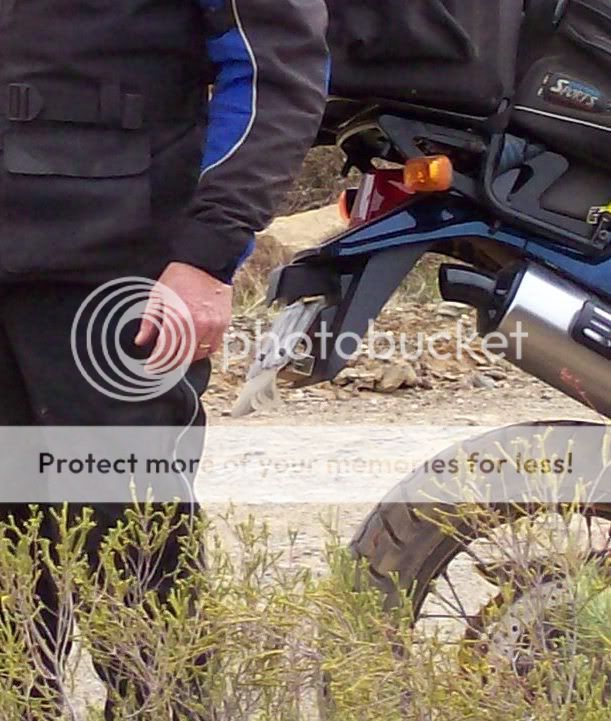
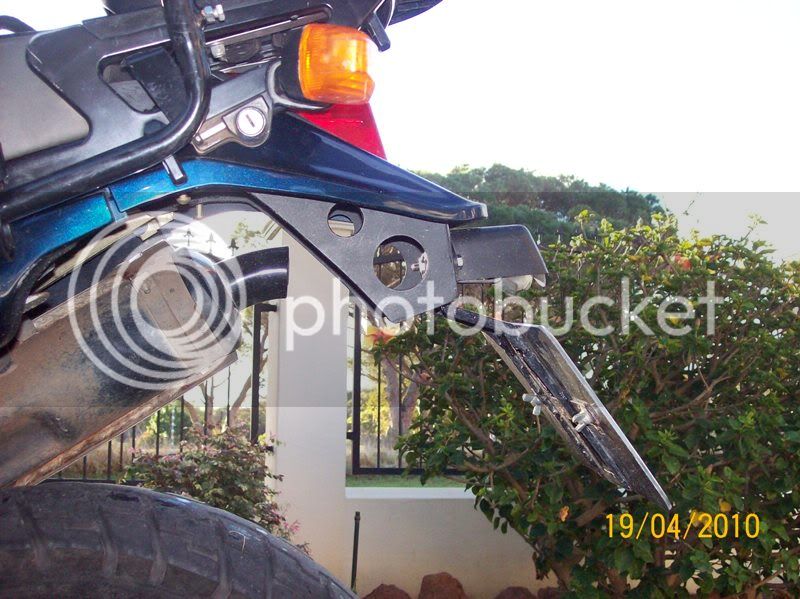
Below are some of the unsuccessful plans I made before the surgery – the aluminium bracket fitted to the plastic mud guard but the number plate already in tatters, and later a smaller aluminium number plate (not to SABS standards) which I could bend back in shape when necessary:
and
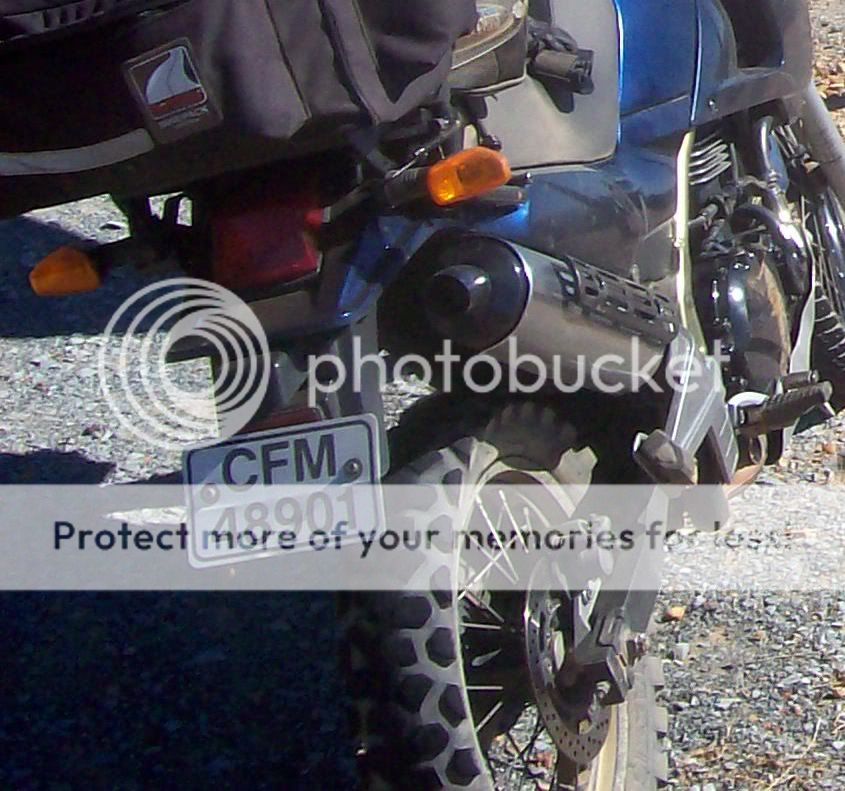
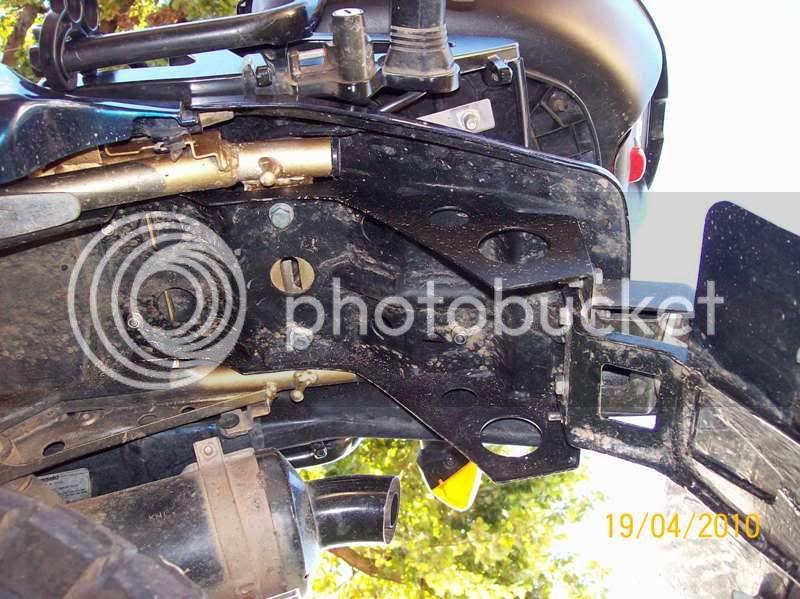
When the blue tail piece started to crack I disassembled the backside to see what is going on.
This backside is not very strong (being a KLE and all), and my earlier modifications didn’t help:
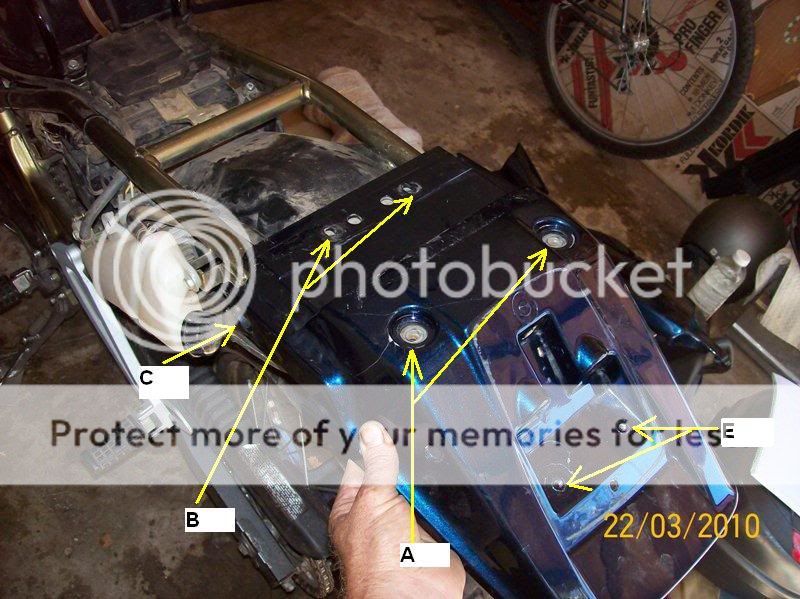
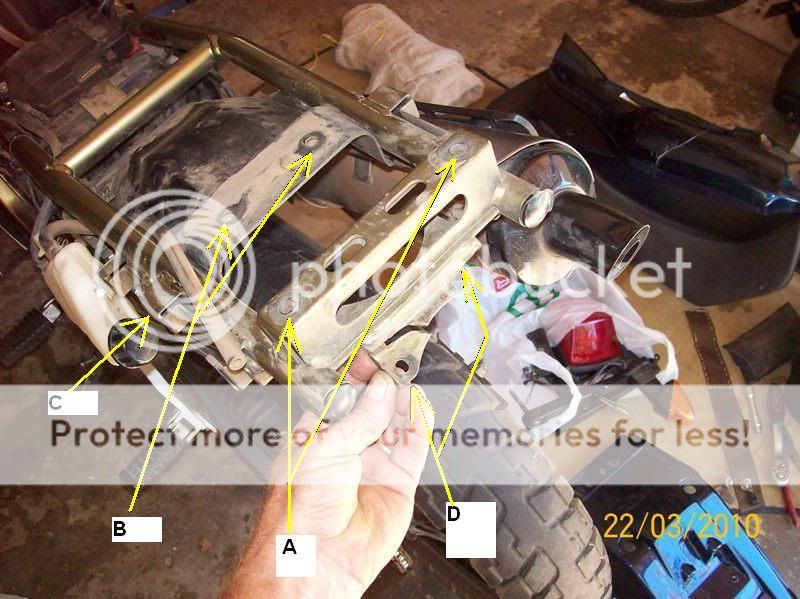
A and C in the two photos above are the mounting points on the frame for the blue tail piece and the luggage frame on top of that. The blue tail piece mounts onto C with rubber bushes, so a lot of flex there.
Points B are also used, but these are on the flexible splash guard forming the wheel arch.
Points D and E are the only mounting points for the mud guard/number plate assembly (which I earlier made heavier with extra brackets) – but D are flimsy metal extensions which have broken off and E are not supported by the frame. So apart from the tail light sitting in the region between A and E, a lot of extra stress was placed on the blue part; you can see the cracks.
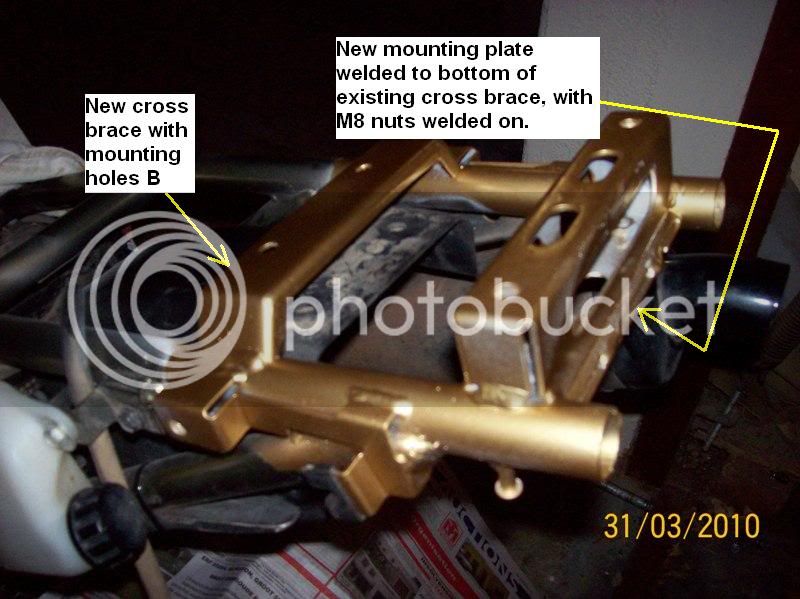
The solution was to provide more support on the frame for the blue tail piece and any future metal mud guard and number plate bracket. So I made two strong brackets and had them neatly MIG-welded to the frame.
The next photo was taken after an undercoat of Krylon rustproof spray paint and some gold top coat courtesy of Checkers:
Next I bent an elaborate plate from 1.6 mm steel to bolt snugly and precisely to the underside of my new supports, extending far backwards to clear the wheel. I cut out gussets for strength and looks and had them welded onto my new plate. I also added a channel for the wiring loom and had some holes cut to save weight and to mount the number plate light.
The white rust proof undercoat baking in the oven:
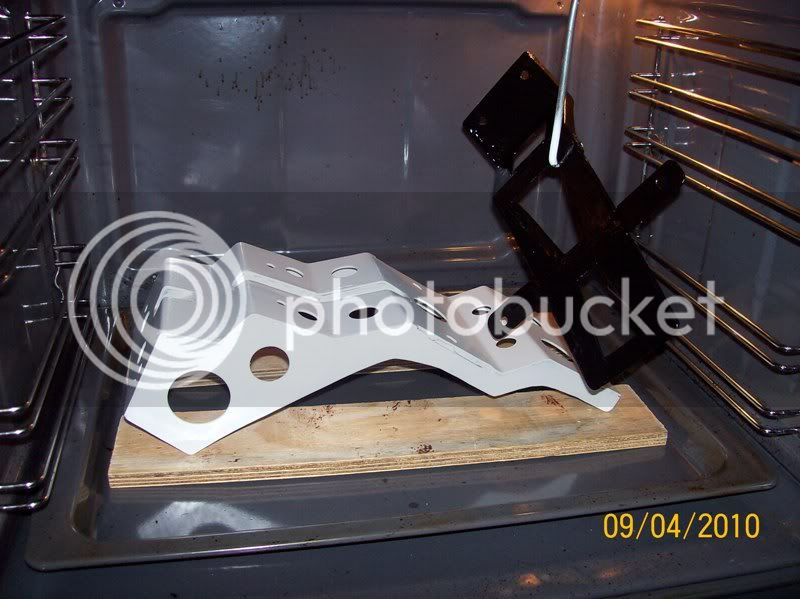
(The black bracket hanging in the oven bolts onto the back of my new mud guard to house the number plate.)
This is the end result from nearby and from underneath:
The new system is all metal, very rigid and clears the back wheel good. The now plastic welded blue tail piece bolts onto it and experiences NO flexing. My new mud guard is a bit heavy – in hindsight I could have used 1mm thick steel and had it just as strong. But what the hell, weight is not everything, for me anyway. I’ll just check the back frame from time to time for signs of stress.
The steel were all off cut pieces and cost me nothing. I had the welding done at Aspect Steel and Staalverspreiders in the Strand and it cost me about R130. The bending I did myself on their machine. The can of gold spray paint cost about R24, I had the undercoat in the garage. I bought a few stainless steel bolts, spring washers and Nylock nuts for a few Rand.
I spent a lot of my time after work on this, but didn’t charge for it.
O and I had the underside of my new mud guard polycoated at Coastal Poly Coatings in the Strand but it was unsuccessful (too thick and heavy) so I removed it again – it took me 1 1/2 hours. It cost me R100. Fantastic product on bakkies and trailers.
Kawasaki can buy the whole design from me. It works, I’ve tested it well this last week and weekend. But time will tell – maybe I’ll have to strengthen something else later on because of this hefty modification…
Any comments are welcome.
Maybe this belongs under the Pooratech Thread, or the KLE Apppreciation Group, but here goes:
The problem is that the plastic mud guard is fairly flexible, especially with the added mass of the number plate mounted right at the bottom - so there is a lot of flex in the system. Together with the soft suspension, the result is that tyre and number plate meet each other on corrugated roads and when you go fast through low drifts and over bumps, as is the way to go of course. Most of the KLE’s I’ve seen do this.
After I lost the second or third number plate I mounted the next one higher up and at an angle further away from the wheel, using a piece of aluminium tubing. That helped only a little.
Later I made a steel bracket to angle the number plate even further away, bolting it to the inside of the mud guard where the number plate light is fitted. The added weight and leverage quickly tore the mud guard, and to my dismay even the painted tail piece started to crack up.
Refusing to change my riding style or keeping off dirt, I had to make a drastic change to the hardware.
These two pictures show the before and after:
and
The change to the backside is subtle. Nothing extravagant.
Below are some of the unsuccessful plans I made before the surgery – the aluminium bracket fitted to the plastic mud guard but the number plate already in tatters, and later a smaller aluminium number plate (not to SABS standards) which I could bend back in shape when necessary:
and
When the blue tail piece started to crack I disassembled the backside to see what is going on.
This backside is not very strong (being a KLE and all), and my earlier modifications didn’t help:
A and C in the two photos above are the mounting points on the frame for the blue tail piece and the luggage frame on top of that. The blue tail piece mounts onto C with rubber bushes, so a lot of flex there.
Points B are also used, but these are on the flexible splash guard forming the wheel arch.
Points D and E are the only mounting points for the mud guard/number plate assembly (which I earlier made heavier with extra brackets) – but D are flimsy metal extensions which have broken off and E are not supported by the frame. So apart from the tail light sitting in the region between A and E, a lot of extra stress was placed on the blue part; you can see the cracks.
The solution was to provide more support on the frame for the blue tail piece and any future metal mud guard and number plate bracket. So I made two strong brackets and had them neatly MIG-welded to the frame.
The next photo was taken after an undercoat of Krylon rustproof spray paint and some gold top coat courtesy of Checkers:
Next I bent an elaborate plate from 1.6 mm steel to bolt snugly and precisely to the underside of my new supports, extending far backwards to clear the wheel. I cut out gussets for strength and looks and had them welded onto my new plate. I also added a channel for the wiring loom and had some holes cut to save weight and to mount the number plate light.
The white rust proof undercoat baking in the oven:
(The black bracket hanging in the oven bolts onto the back of my new mud guard to house the number plate.)
This is the end result from nearby and from underneath:
The new system is all metal, very rigid and clears the back wheel good. The now plastic welded blue tail piece bolts onto it and experiences NO flexing. My new mud guard is a bit heavy – in hindsight I could have used 1mm thick steel and had it just as strong. But what the hell, weight is not everything, for me anyway. I’ll just check the back frame from time to time for signs of stress.
The steel were all off cut pieces and cost me nothing. I had the welding done at Aspect Steel and Staalverspreiders in the Strand and it cost me about R130. The bending I did myself on their machine. The can of gold spray paint cost about R24, I had the undercoat in the garage. I bought a few stainless steel bolts, spring washers and Nylock nuts for a few Rand.
I spent a lot of my time after work on this, but didn’t charge for it.
O and I had the underside of my new mud guard polycoated at Coastal Poly Coatings in the Strand but it was unsuccessful (too thick and heavy) so I removed it again – it took me 1 1/2 hours. It cost me R100. Fantastic product on bakkies and trailers.
Kawasaki can buy the whole design from me. It works, I’ve tested it well this last week and weekend. But time will tell – maybe I’ll have to strengthen something else later on because of this hefty modification…
Any comments are welcome.