


- Joined
- Feb 6, 2006
- Messages
- 11,455
- Reaction score
- 5,126
- Location
- Cape Town, deep in the lentils
- Bike
- KTM 990 Adventure
The trip computer in all LC8’s can be worked from the handlebars with a tripmaster. It’s a plug and play.
Sadly, there are two major issues; They are expensive and there is no “set” function that resets the trips.
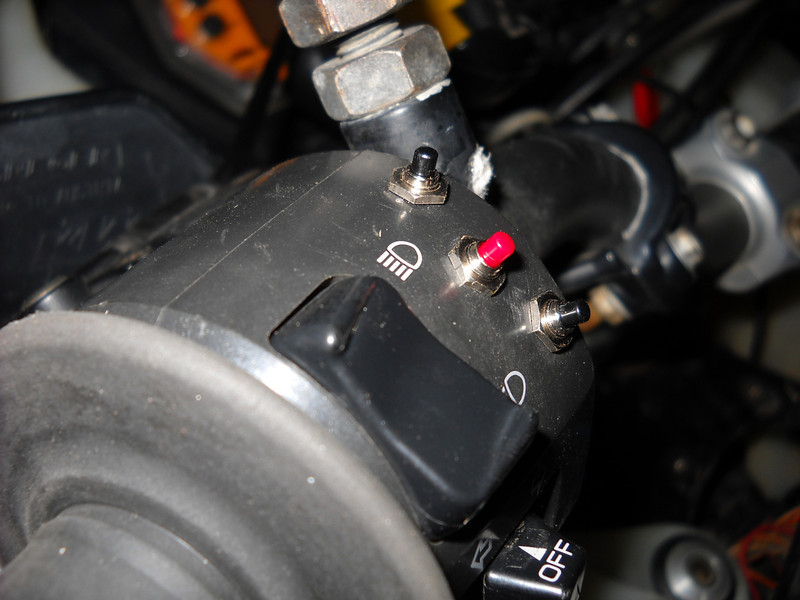
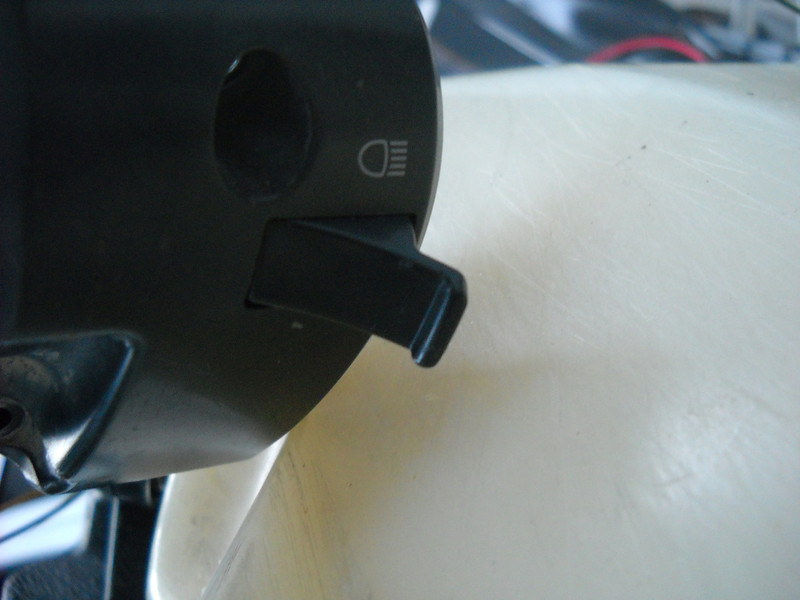
This mod is how to wire up the Highbeam trigger to work the set function as well as make your own tripmaster that looks quite trick. The three buttons on the switchgear are “mode” “scroll up” & “scroll down
To get the buttons working and looking like this;
follow this;
https://advrider.com/forums/showthread.php?t=731728
I then dug up this from a while ago and tried out option 2, but the pictures have been deleted so I contacted the guy referenced at the bottom of the post, he dug up a few and sent them.
https://www.advrider.com/forums/showthread.php?t=83126
Right now that you’ve got the buttons squared away, how to wire the trigger in (take note of KTMax’s warnings about soldering and working on printed circuits!)….
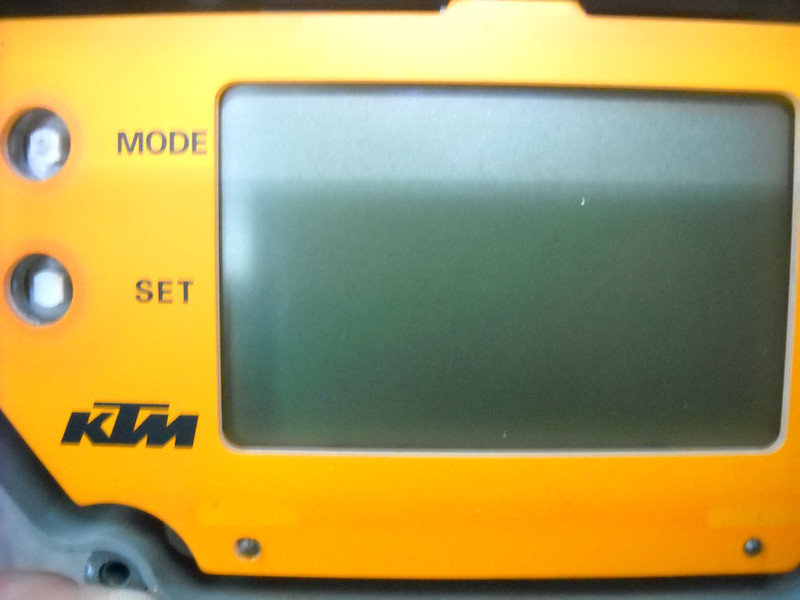
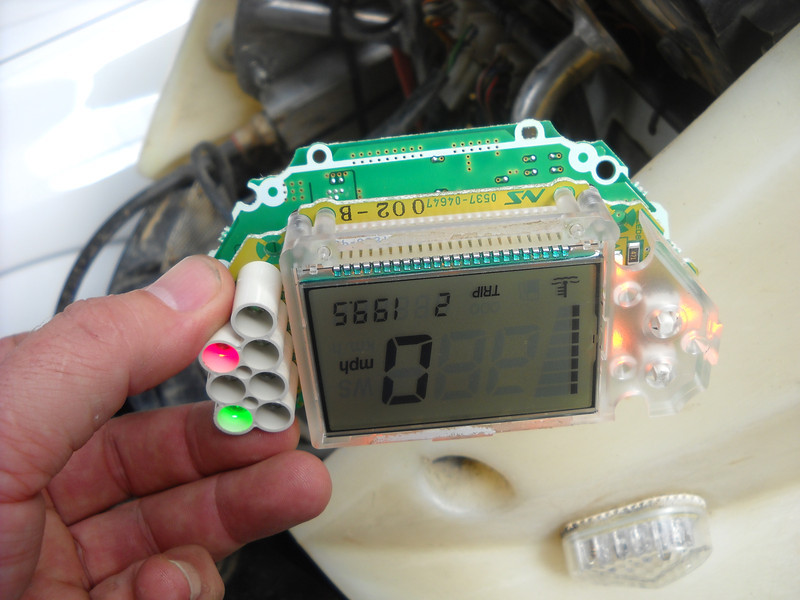
First take the display out and carefully take it apart. This bit is stuck on, so carefully take it off
This has to come apart, it’s fairly intuitive, it’s held together with screws.
Then solder a 6cm jumper onto this side of the "Set" button
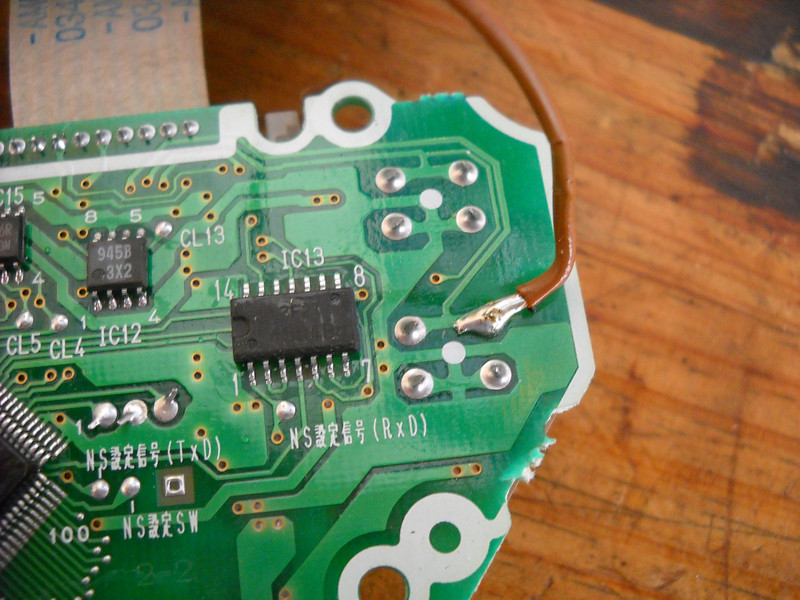
Before you solder check how you are going to route the jumper so that the plastic frame will not snag or crush it once it gets buttoned up.
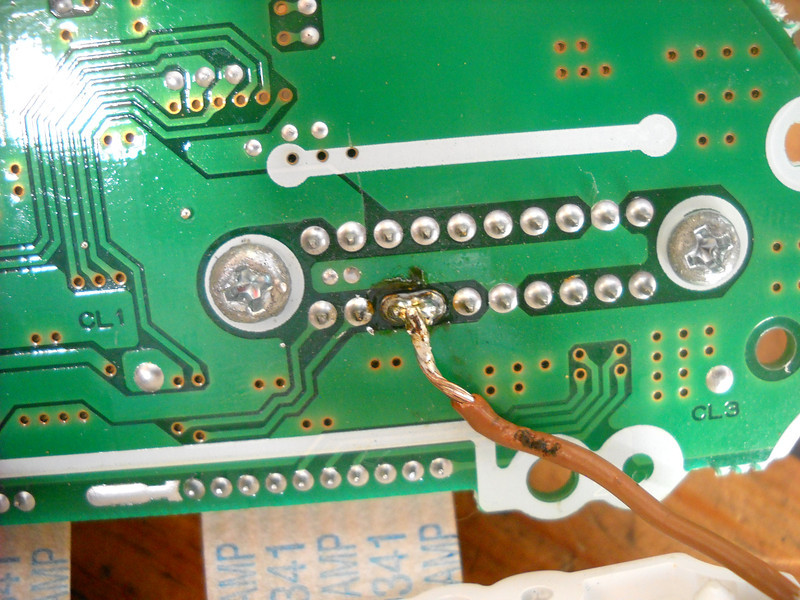
Now solder it to the 17th or 18th pin on the back of the board opposite of were the plug is. If you blob onto both, it’s not a hassle. Clearly, I'm new to pc board soldering.
Right button it back up, do not mount it in it’s case yet. Just leave it like this
You need to check once the rest is done that it all works.
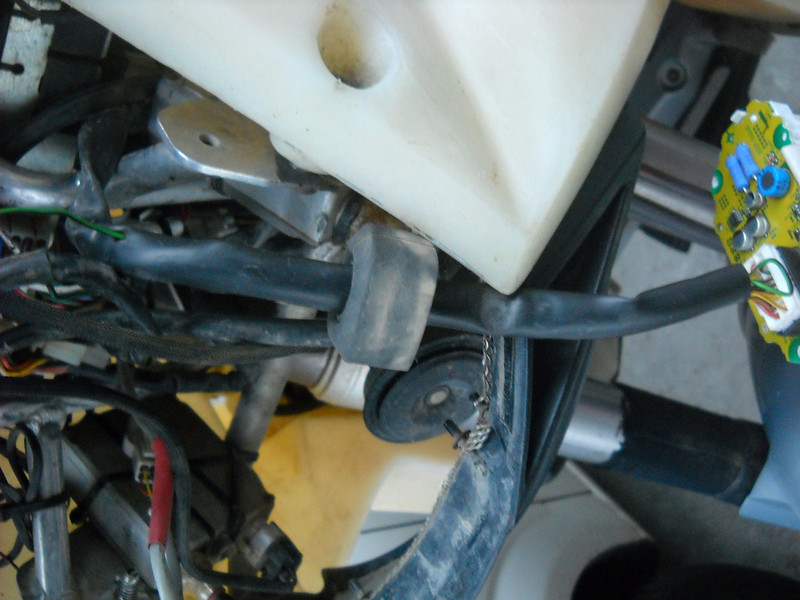
Find this plug behind the dash
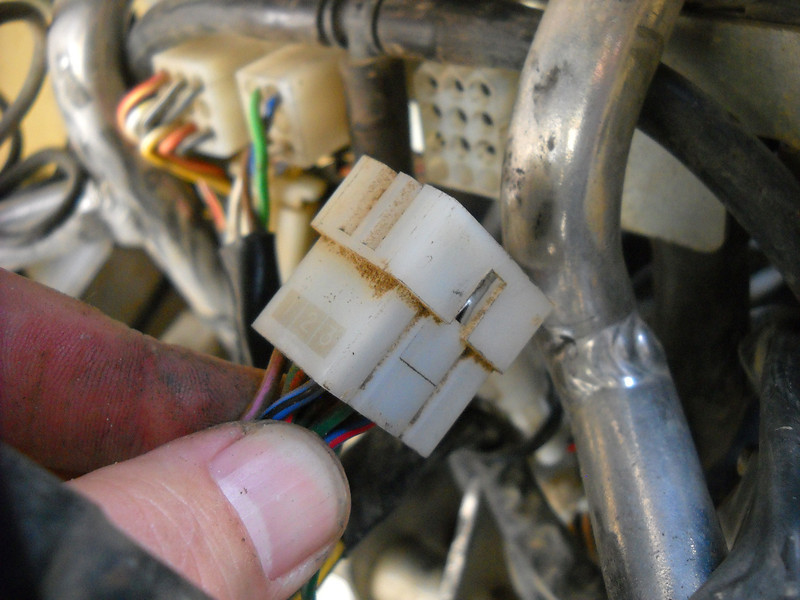
Carefully pull out the greenblack wire, it’s the centre of the centre here;
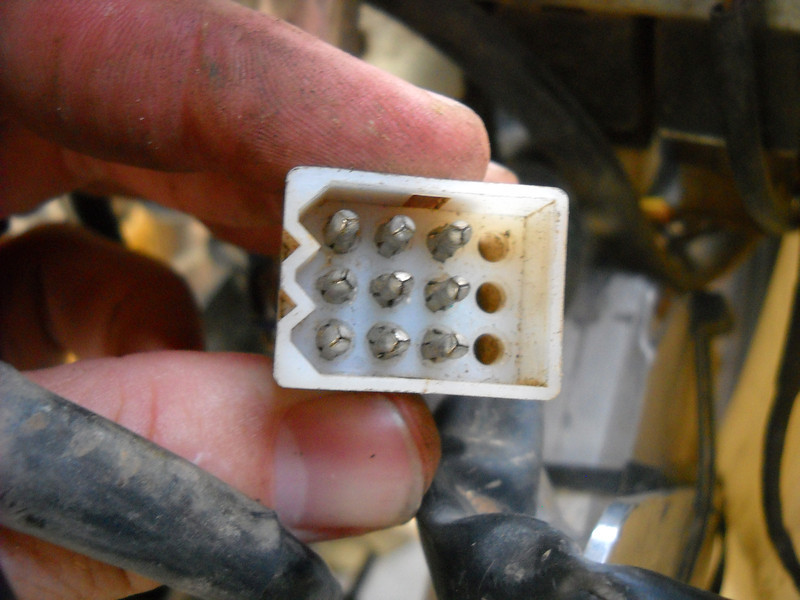
The other wire to the trigger is the white one, leave this plugged in. This is the negative wire. The green/black is the positive, but since you are going to be unplugging it from the power and wiring it to 18th pin, when you pull the trigger, it completes the ground circuit.
The really awkward thing that will make this a bit of a challenge is that you need to find one of these to fit into the 18 hole. Aparently TYCO make them, I have an old harness that I harvested a few from.
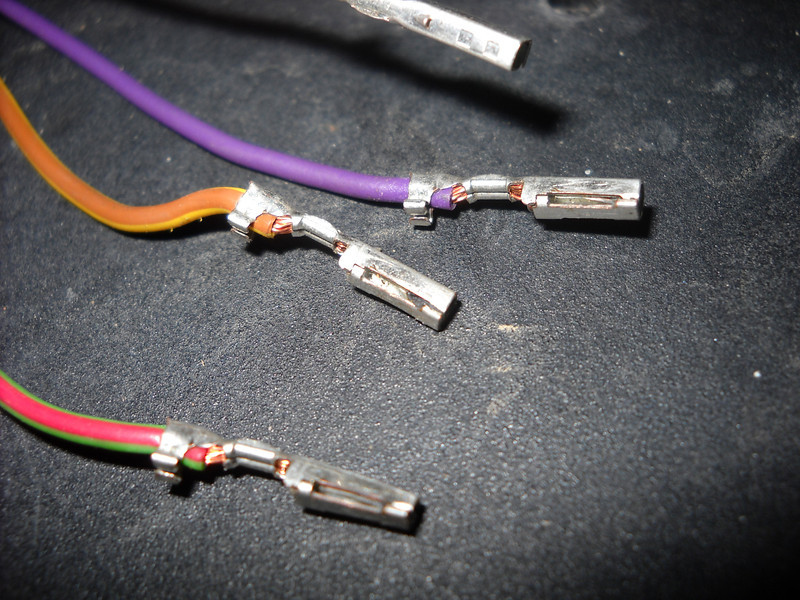
I then ran one of them from the plug15cm down the sheath out a hole I had made in the sheath and then joined it to the previously mentioned wire.
Now plug it all together and if you have it right, this now trips the set button
Apart from the one connector for the 20 pin plug and 3 buttons, it's a cheap mod.
Sadly, there are two major issues; They are expensive and there is no “set” function that resets the trips.
This mod is how to wire up the Highbeam trigger to work the set function as well as make your own tripmaster that looks quite trick. The three buttons on the switchgear are “mode” “scroll up” & “scroll down
To get the buttons working and looking like this;
follow this;
https://advrider.com/forums/showthread.php?t=731728
I then dug up this from a while ago and tried out option 2, but the pictures have been deleted so I contacted the guy referenced at the bottom of the post, he dug up a few and sent them.
https://www.advrider.com/forums/showthread.php?t=83126
Right now that you’ve got the buttons squared away, how to wire the trigger in (take note of KTMax’s warnings about soldering and working on printed circuits!)….
First take the display out and carefully take it apart. This bit is stuck on, so carefully take it off
This has to come apart, it’s fairly intuitive, it’s held together with screws.
Then solder a 6cm jumper onto this side of the "Set" button
Before you solder check how you are going to route the jumper so that the plastic frame will not snag or crush it once it gets buttoned up.
Now solder it to the 17th or 18th pin on the back of the board opposite of were the plug is. If you blob onto both, it’s not a hassle. Clearly, I'm new to pc board soldering.
Right button it back up, do not mount it in it’s case yet. Just leave it like this
You need to check once the rest is done that it all works.
Find this plug behind the dash
Carefully pull out the greenblack wire, it’s the centre of the centre here;
The other wire to the trigger is the white one, leave this plugged in. This is the negative wire. The green/black is the positive, but since you are going to be unplugging it from the power and wiring it to 18th pin, when you pull the trigger, it completes the ground circuit.
The really awkward thing that will make this a bit of a challenge is that you need to find one of these to fit into the 18 hole. Aparently TYCO make them, I have an old harness that I harvested a few from.
I then ran one of them from the plug15cm down the sheath out a hole I had made in the sheath and then joined it to the previously mentioned wire.
Now plug it all together and if you have it right, this now trips the set button
Apart from the one connector for the 20 pin plug and 3 buttons, it's a cheap mod.