


Makmoer
Pack Dog
DESCRIPTION:
This thread describes a DIY fuel hose/connector replacement on my '04 1150 GSA using after-market parts. Cost saving: R2,310-00. May be applied to other makes using the same part.
START:
So I had one of those fateful days where fixing something small like a spotlight bulb resulted in shorted fuse; said fuse mounted underneath the tank, and in the process of removing the tank, I broke one of those flimsy quick connectors on the fuel line. Nothing further mentioned about my own fuse :dousing:.
****** ****** ****** ****** ****** ****** ****** ******
Indemnity: I postponed posting this thread by 90 days (doing some 7000km's including a "fall" all the way to Ponta, to be posted in ride reports (hopefully after this)) just to be sure the connectors held tight and no accidental fuel spillage resulted in a fiery end to one helluva nice bike (ahem).
Also, I may refer to parts by their non-technical name. Apologize profusely, just bear with me.
IMPORTANT: REMOVE ANY OPEN FLAME FROM THIS AREA, IF NEEDED, DISCONNECT BATTERY, BRAIN, ETC.
***** ***** ****** ****** ****** ****** ****** ******
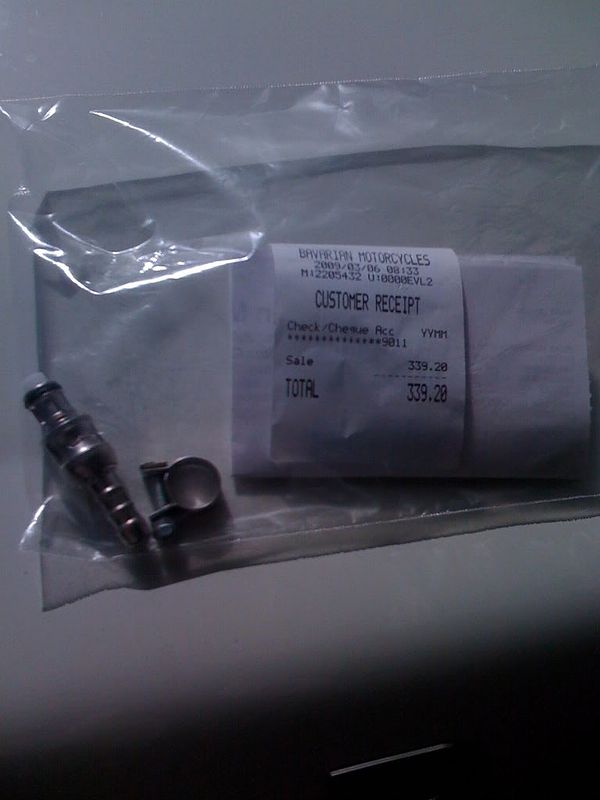
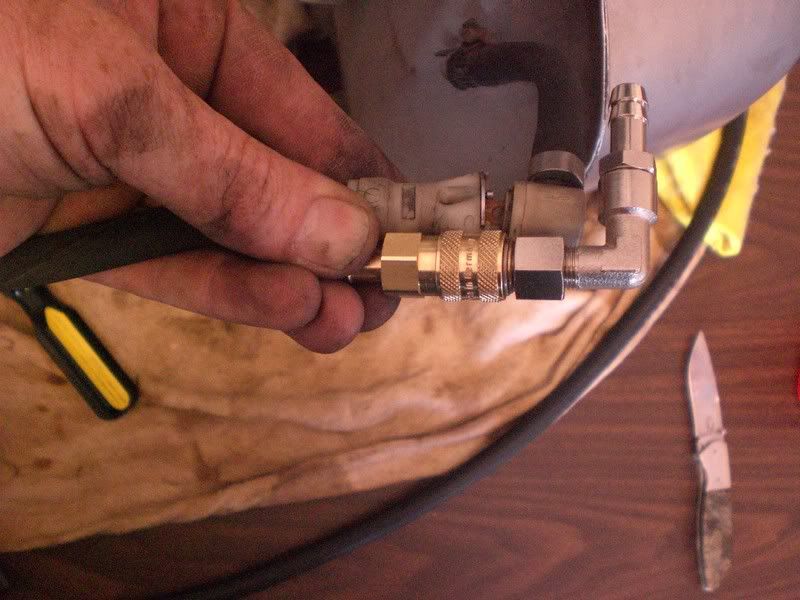
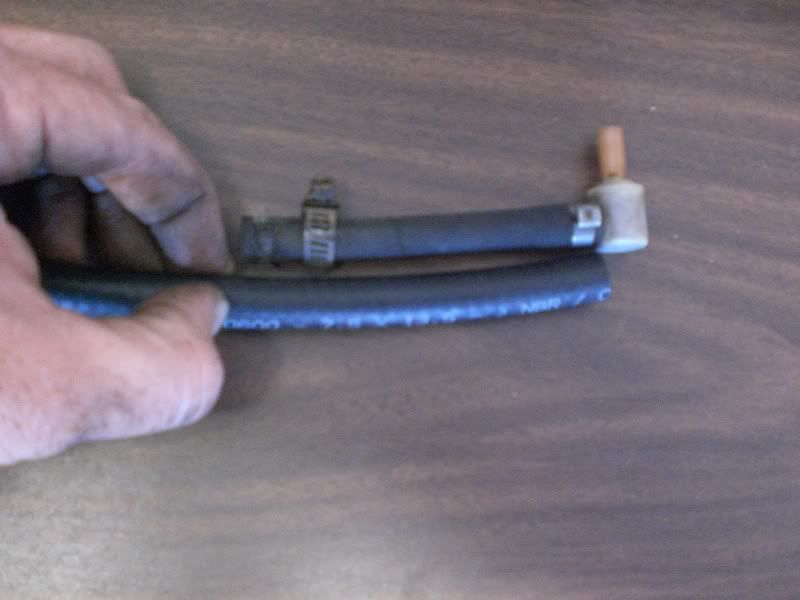
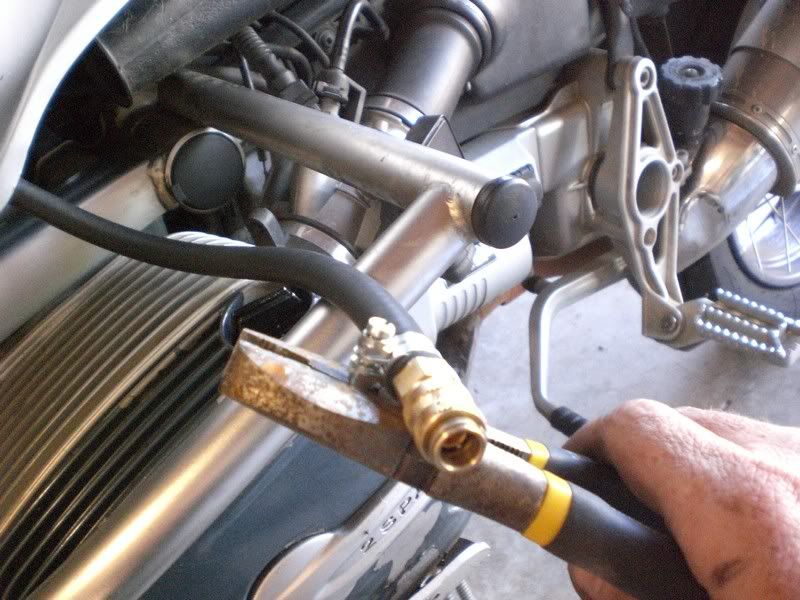
Mistake: Bought the replacement OEM part from BMW for R339 (now a steel unit because the plastic ones kept on breaking... no kidding). Check pic below.
Doing some more research on WD's, some Samaritan (will search his thread after this and post his name.. thanks!) mentioned quick connectors from Hydraulic Design and Services (Pty) Ltd, 011.793.5826. And so it started. The german guy there is really very helpful and equally knowledgeable, supplied everything I asked for first time and explained installation requirements, etc.
EDIT: Here's Obi -wan's post:
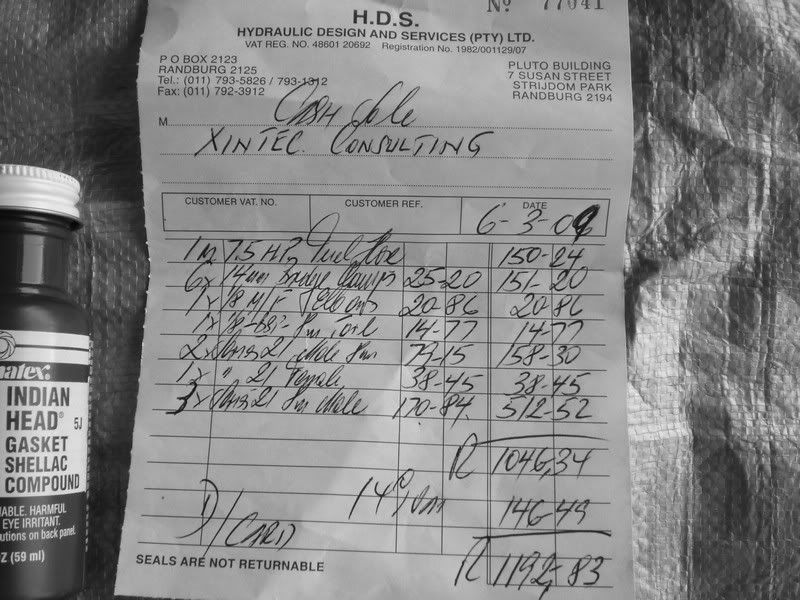
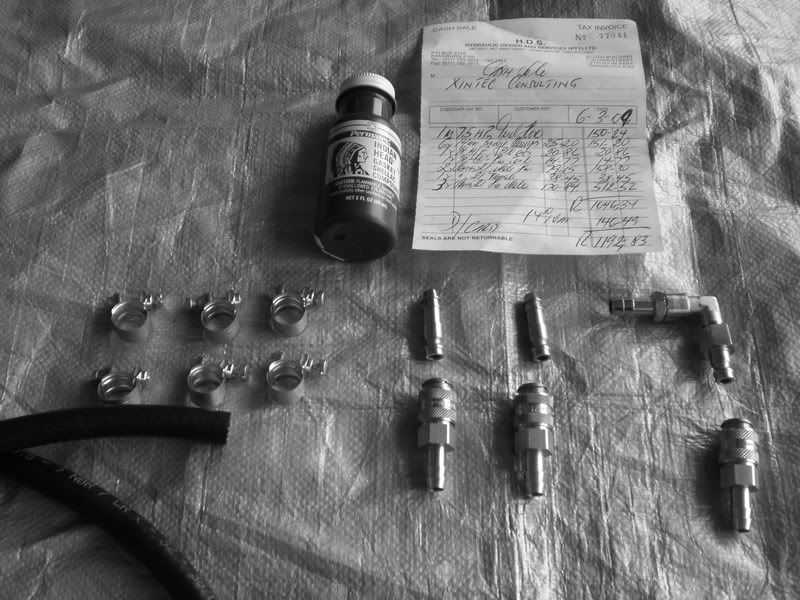
Shown below the parts list and prices to replace ALL connectors with proper steel fittings and new fuel lines. Total: R1192.
The descent clamps are pricey, but well worth it.
A brief description of the process:
Drain the fuel or ride it to empty.. dont want to lug 30 litres around for this process.
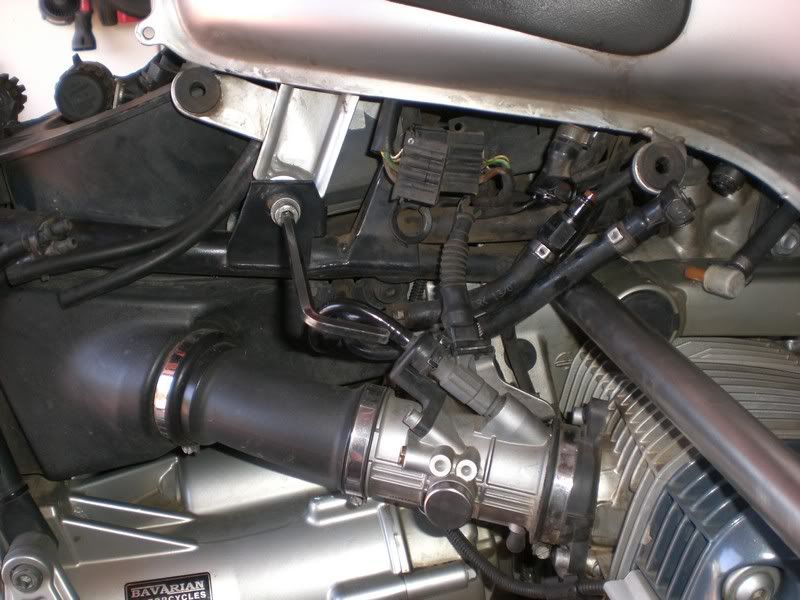
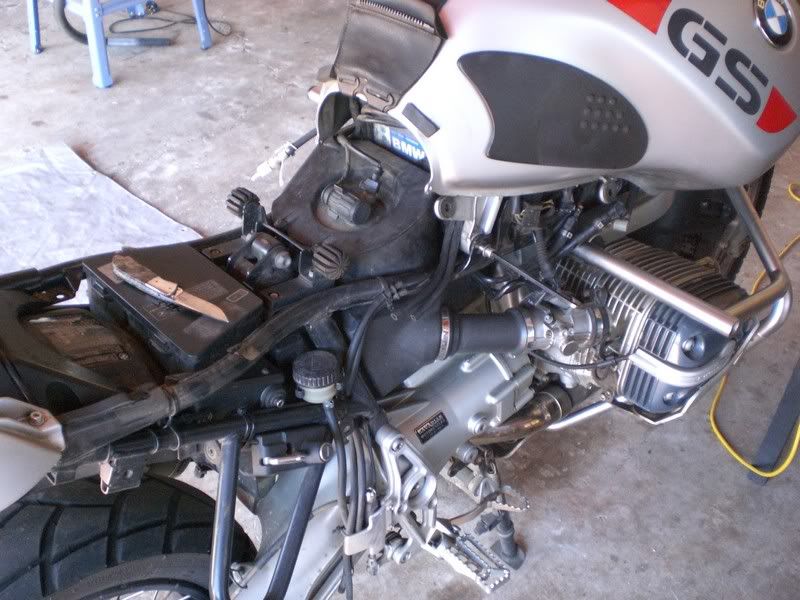
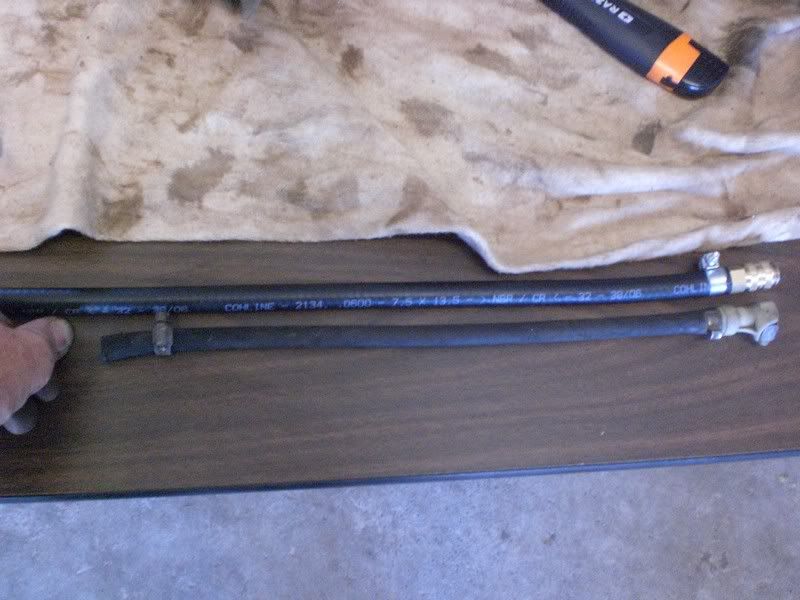
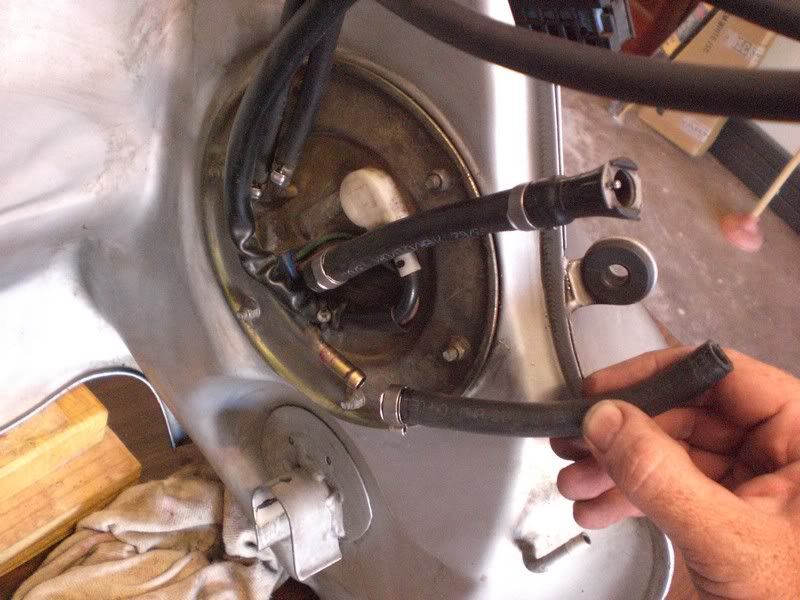
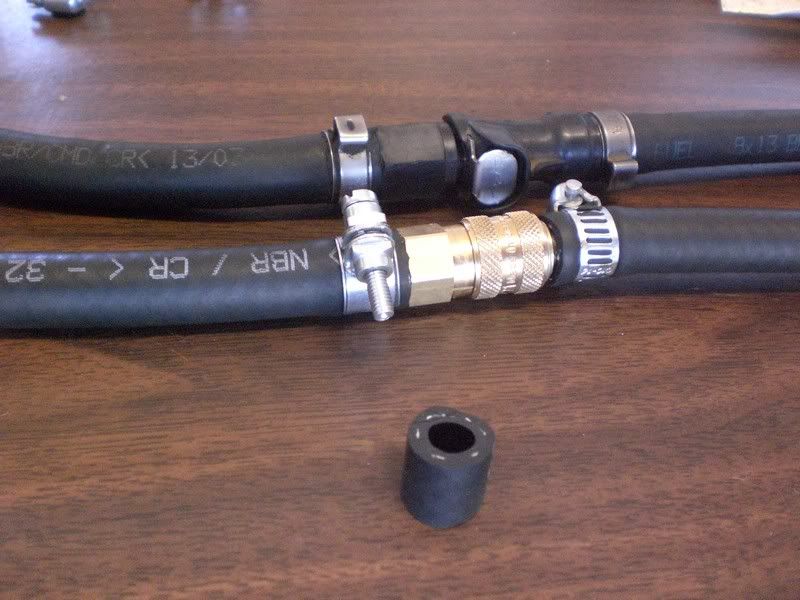
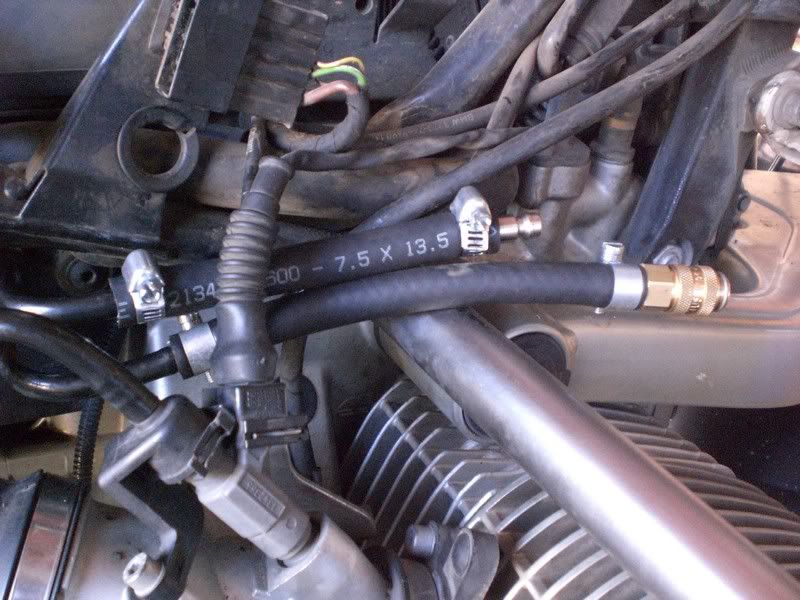
I took 1m high pressure fuel hose, and it turns out you need precisely one meter. Pic below of RH sidecover removed before work started. You can see the two standard male/female connectors and the single elbow unit; latter feeding over engine to other side of fuel tank.
Remove tank and flip it over (on a soft non-slip surface ... not shown :biggrin") . Here you can see the top-side of the standard connectors, and also the elbow type connector hose. You want to start by removing these hoses and measure equal lengths from your replacement pipes. The long pipes are breathers, ignore them.
. Here you can see the top-side of the standard connectors, and also the elbow type connector hose. You want to start by removing these hoses and measure equal lengths from your replacement pipes. The long pipes are breathers, ignore them.

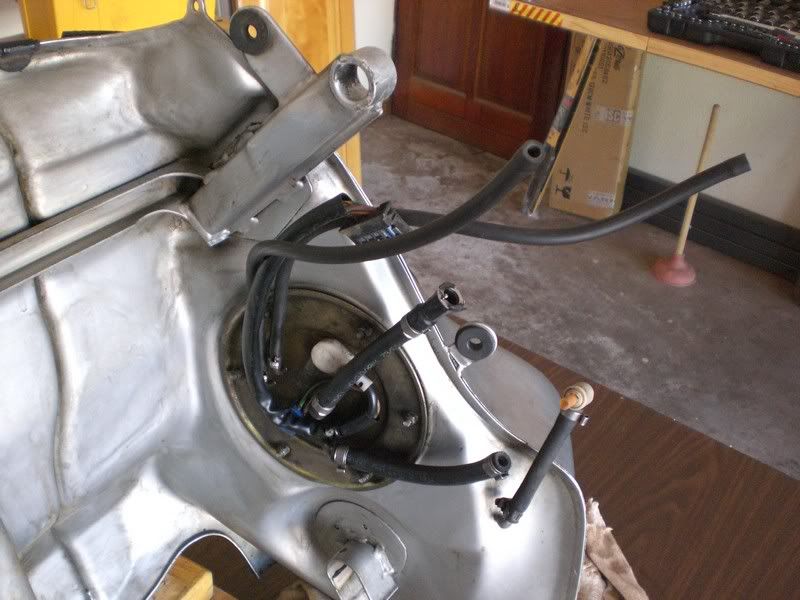
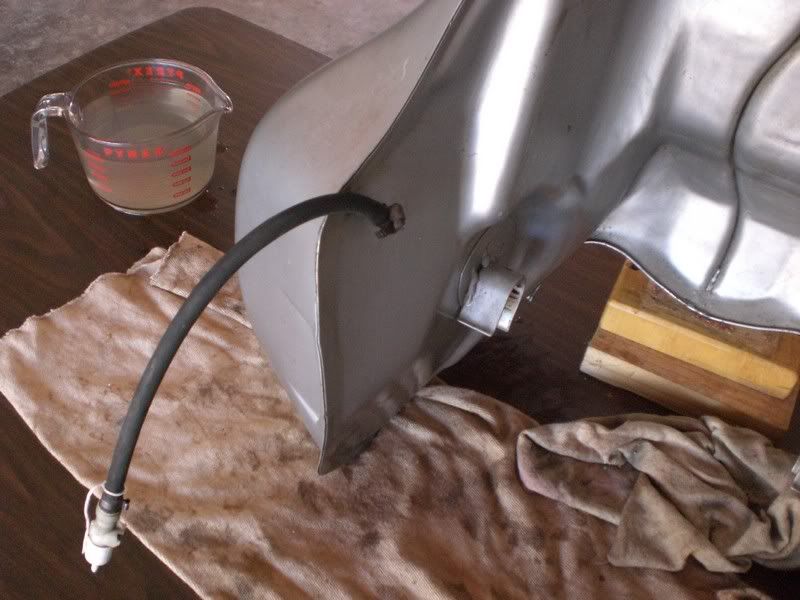
Pic below for LH fuel pipe that runs across the engine to equalize both sides of the tank (I presume). Remove this one and also measure equal lengths from your new pipe, making sure you account for the difference in length of the replacement connectors!
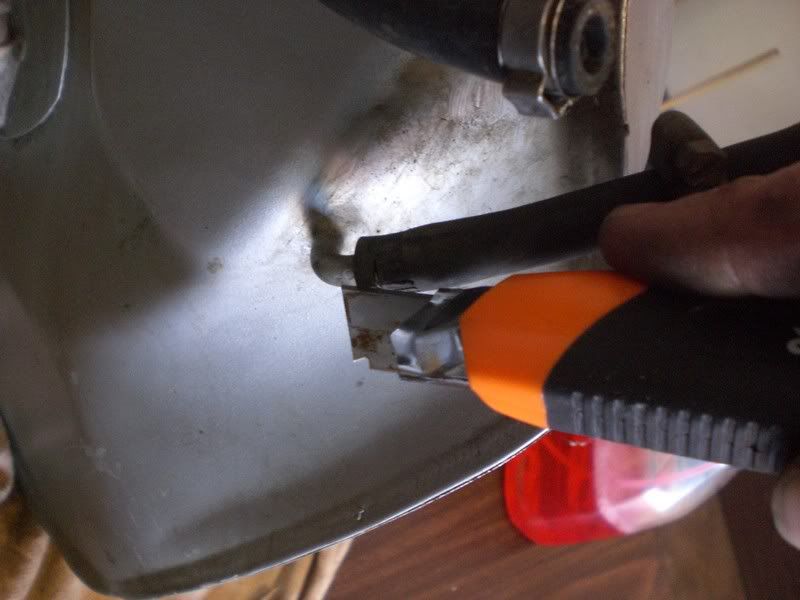
Make small cuts to loosen the old pipe as it may have been stuck on there with some strangely strong glue. Wrenching it may damage the fixed extension from the tank.. the last thing you need.
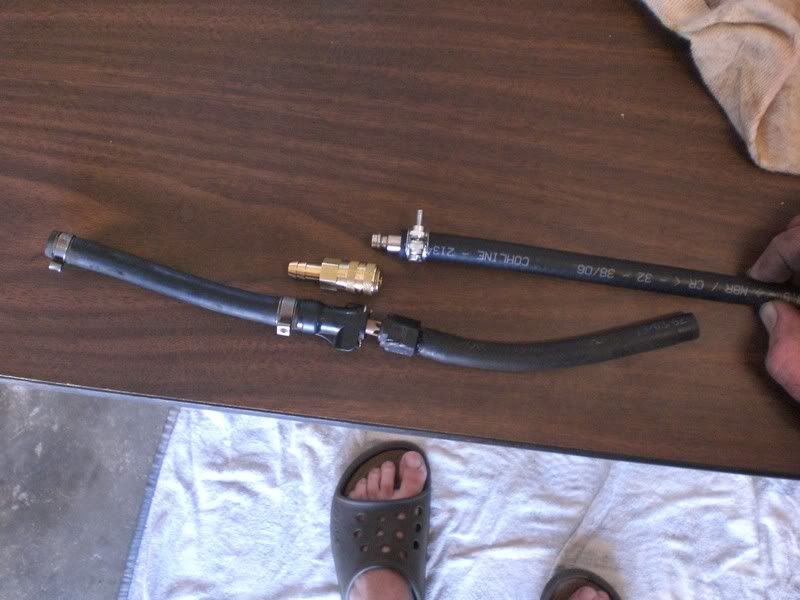
Compare new vs. old like this (old school way, you can be smarter if you like).
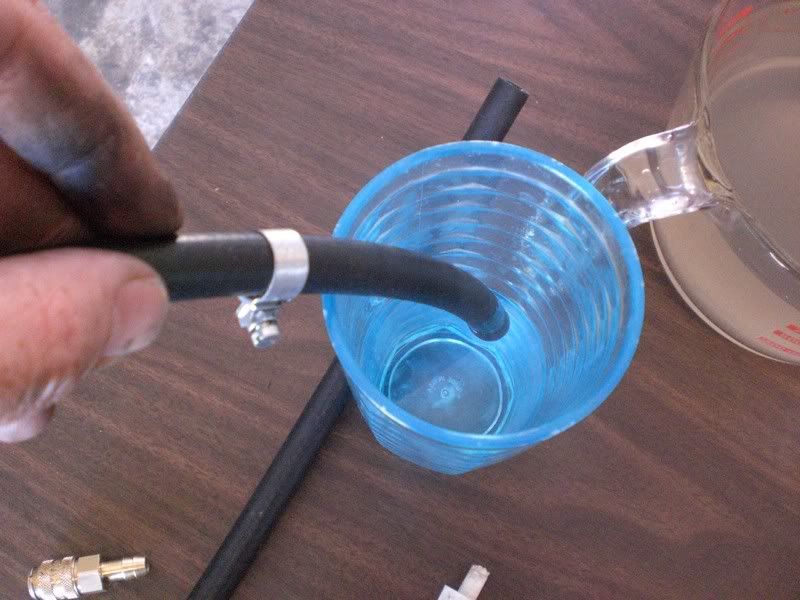
With measurements done, and cuts made, heat up the new pipe and install the new connectors (thats boiled water in the cup ok). Just be sure you shake off any excess water as it wont combust well :mwink:. And for Heaven's sake, abandon any thoughts of heating the pipe with a lighter, no matter how gatvol you are. In fact, remove anything that is capable of an open flame from the garage, including smoking onlookers, ignition sparks (ehh.. dunno, remove the key and disconnect the battery?), and so on.
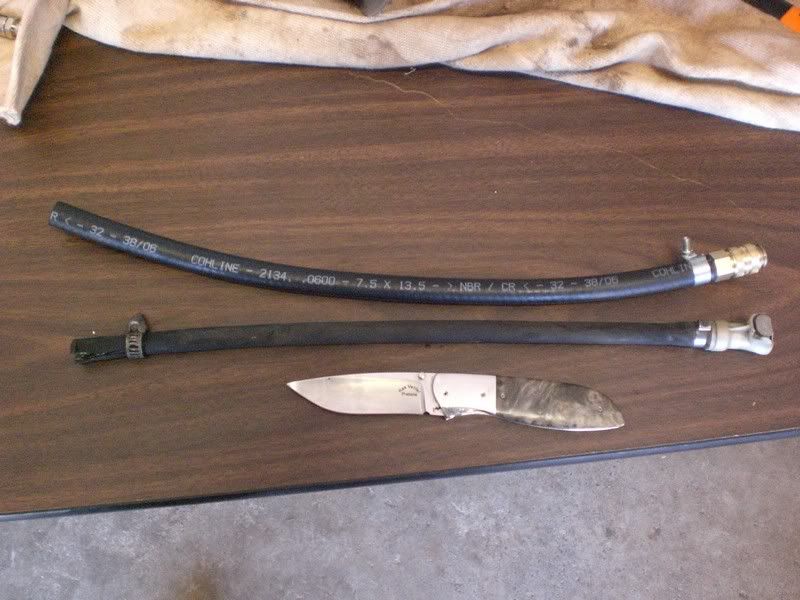
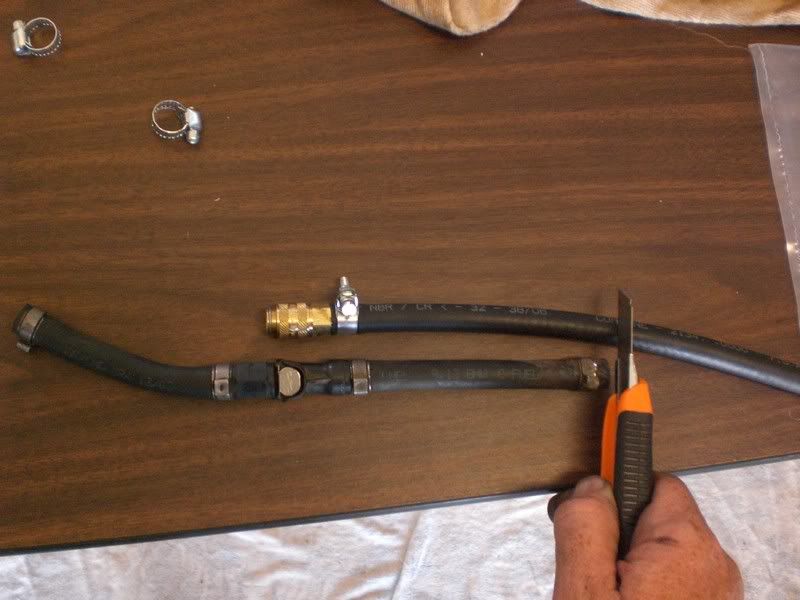
Compare old vs. new side by side... seen here, for the elbow-connector (yes, theonerunningacrosstheengine) I added about 0.5cm.
Then on to removing, comparing and cutting the other hoses.

Yes, I ran out of high qual clamps, and had to settle for garden variety. Just saw off the rest of the protruding bolt.. could be hazardous around fuel lines and rough roads. Note the small piece of hose in the foreground -- thats all that was left of the 1m roll. Welcome coincidence or excellent planning :-\
(dis nie my geroeste tang daai nie...)
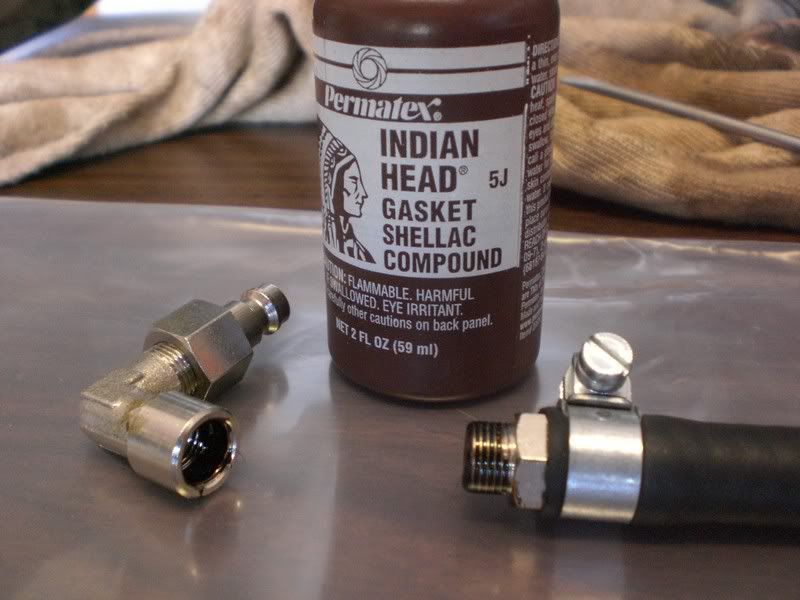
Remember to also grab a bottle of Indian Head gasket compound to hold connectors together.. beware of the strangely bushy brush/applicator. You'll have indian head leaking all over the place in no time.
Next, start by installing all your completed units to the tank, making sure everything fits snug and not leaking. You dont want to finish the installation standing in a puddle of gasoline.
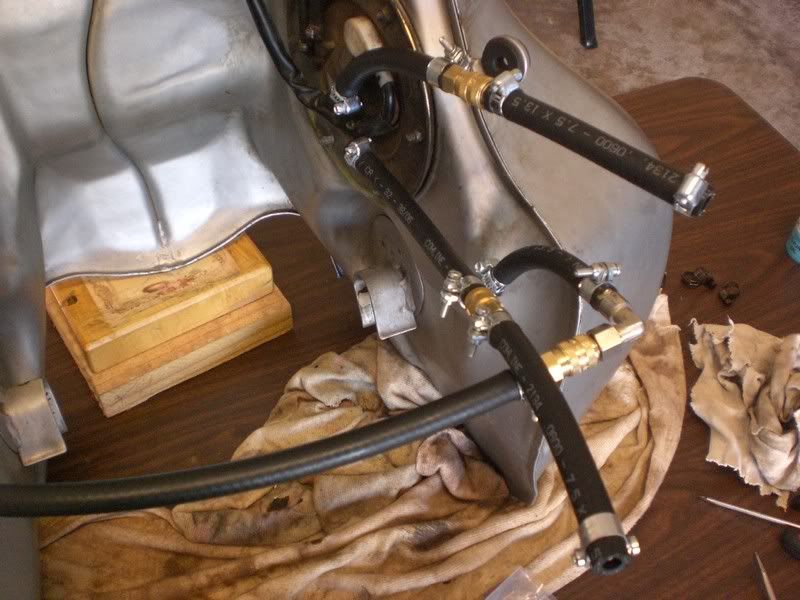
Install bottom hoses (right side view):
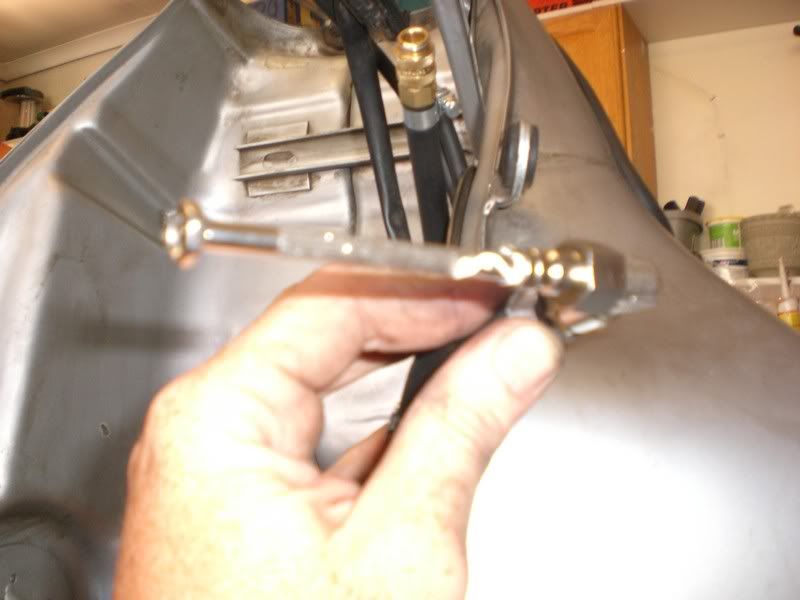
Reinstall fuel tank. Feed the left side hose over engine/under tank where elbow connector joins on the righthand side. I had a small miscalculation here (that may prove inconvenient in future). The female end of this connector type does not auto-seal, so if you still had a few litres of gasoline in the tank, feeding the hose through to the other (RH) side will have fuel spilling all over the place. You dont want this of course. So I looked around for something to plug it, and found this hobby-type screwdriver seals the hole perfectly. Problem solved... for now. Pardon the bad quality if this pic.
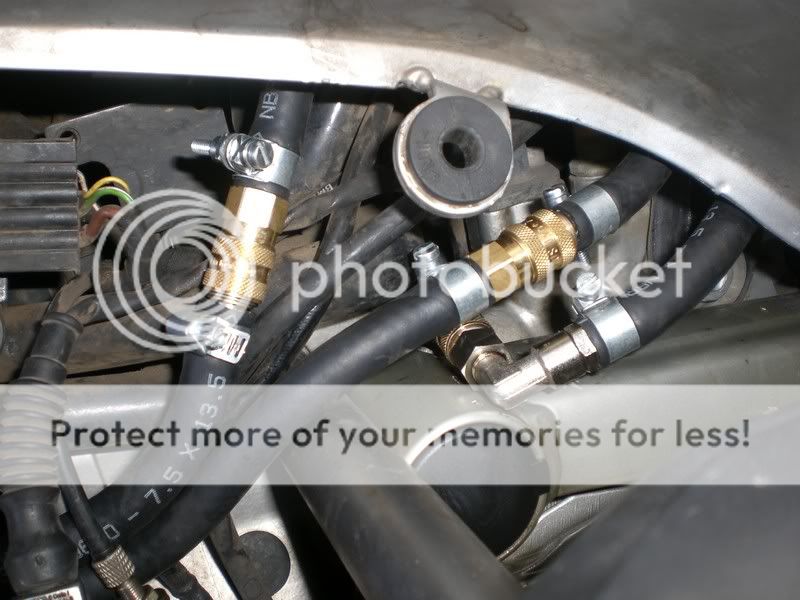
All done. Lastly, a closeup of the RH side where the new connectors are now installed. I added cable ties to secure them. These connectors attach/detach much easier than the original plastic part (no blood involved), and they hold on like nothing else. As I said, we did a couple of proper cross-country trips (Roma & Ramabanta, halfway up Baboons... ok, maybe a third; Ponta do Ouro, Moz, etc.) ... no leaks, no problems.
Hope this helps anyone out there. The equivalent price for OEM parts would have been around R3500 plus labour.
Cheers.
This thread describes a DIY fuel hose/connector replacement on my '04 1150 GSA using after-market parts. Cost saving: R2,310-00. May be applied to other makes using the same part.
START:
So I had one of those fateful days where fixing something small like a spotlight bulb resulted in shorted fuse; said fuse mounted underneath the tank, and in the process of removing the tank, I broke one of those flimsy quick connectors on the fuel line. Nothing further mentioned about my own fuse :dousing:.
****** ****** ****** ****** ****** ****** ****** ******
Indemnity: I postponed posting this thread by 90 days (doing some 7000km's including a "fall" all the way to Ponta, to be posted in ride reports (hopefully after this)) just to be sure the connectors held tight and no accidental fuel spillage resulted in a fiery end to one helluva nice bike (ahem).
Also, I may refer to parts by their non-technical name. Apologize profusely, just bear with me.
IMPORTANT: REMOVE ANY OPEN FLAME FROM THIS AREA, IF NEEDED, DISCONNECT BATTERY, BRAIN, ETC.
***** ***** ****** ****** ****** ****** ****** ******
Mistake: Bought the replacement OEM part from BMW for R339 (now a steel unit because the plastic ones kept on breaking... no kidding). Check pic below.
Doing some more research on WD's, some Samaritan (will search his thread after this and post his name.. thanks!) mentioned quick connectors from Hydraulic Design and Services (Pty) Ltd, 011.793.5826. And so it started. The german guy there is really very helpful and equally knowledgeable, supplied everything I asked for first time and explained installation requirements, etc.
EDIT: Here's Obi -wan's post:
Obi -Wan said:Hydraulic Design Service in Strydompark
Ask for a Rectus t21 coupler - both male and female - made out of pure brass - take old plastic coupler with to ensure inside diameter is right. R200 PLUS vat FOR BOTH!!!
7 Susan Street
Strijdom Park
Randburg
011-793-5826
Makes up brake pipes as well in braided hose as per your requirements.
Shown below the parts list and prices to replace ALL connectors with proper steel fittings and new fuel lines. Total: R1192.
The descent clamps are pricey, but well worth it.
A brief description of the process:
Drain the fuel or ride it to empty.. dont want to lug 30 litres around for this process.
I took 1m high pressure fuel hose, and it turns out you need precisely one meter. Pic below of RH sidecover removed before work started. You can see the two standard male/female connectors and the single elbow unit; latter feeding over engine to other side of fuel tank.
Remove tank and flip it over (on a soft non-slip surface ... not shown :biggrin
. Here you can see the top-side of the standard connectors, and also the elbow type connector hose. You want to start by removing these hoses and measure equal lengths from your replacement pipes. The long pipes are breathers, ignore them.
Pic below for LH fuel pipe that runs across the engine to equalize both sides of the tank (I presume). Remove this one and also measure equal lengths from your new pipe, making sure you account for the difference in length of the replacement connectors!
Make small cuts to loosen the old pipe as it may have been stuck on there with some strangely strong glue. Wrenching it may damage the fixed extension from the tank.. the last thing you need.
Compare new vs. old like this (old school way, you can be smarter if you like).
With measurements done, and cuts made, heat up the new pipe and install the new connectors (thats boiled water in the cup ok). Just be sure you shake off any excess water as it wont combust well :mwink:. And for Heaven's sake, abandon any thoughts of heating the pipe with a lighter, no matter how gatvol you are. In fact, remove anything that is capable of an open flame from the garage, including smoking onlookers, ignition sparks (ehh.. dunno, remove the key and disconnect the battery?), and so on.
Compare old vs. new side by side... seen here, for the elbow-connector (yes, theonerunningacrosstheengine) I added about 0.5cm.
Then on to removing, comparing and cutting the other hoses.
Yes, I ran out of high qual clamps, and had to settle for garden variety. Just saw off the rest of the protruding bolt.. could be hazardous around fuel lines and rough roads. Note the small piece of hose in the foreground -- thats all that was left of the 1m roll. Welcome coincidence or excellent planning :-\
(dis nie my geroeste tang daai nie...)
Remember to also grab a bottle of Indian Head gasket compound to hold connectors together.. beware of the strangely bushy brush/applicator. You'll have indian head leaking all over the place in no time.
Next, start by installing all your completed units to the tank, making sure everything fits snug and not leaking. You dont want to finish the installation standing in a puddle of gasoline.
Install bottom hoses (right side view):
Reinstall fuel tank. Feed the left side hose over engine/under tank where elbow connector joins on the righthand side. I had a small miscalculation here (that may prove inconvenient in future). The female end of this connector type does not auto-seal, so if you still had a few litres of gasoline in the tank, feeding the hose through to the other (RH) side will have fuel spilling all over the place. You dont want this of course. So I looked around for something to plug it, and found this hobby-type screwdriver seals the hole perfectly. Problem solved... for now. Pardon the bad quality if this pic.
All done. Lastly, a closeup of the RH side where the new connectors are now installed. I added cable ties to secure them. These connectors attach/detach much easier than the original plastic part (no blood involved), and they hold on like nothing else. As I said, we did a couple of proper cross-country trips (Roma & Ramabanta, halfway up Baboons... ok, maybe a third; Ponta do Ouro, Moz, etc.) ... no leaks, no problems.
Hope this helps anyone out there. The equivalent price for OEM parts would have been around R3500 plus labour.
Cheers.