


Plothond
Race Dog
- Joined
- Sep 11, 2006
- Messages
- 4,929
- Reaction score
- 10
- Location
- Pretoria East - Home of Jameson
- Bike
- KTM 1090 Adventure R
I fitted an HID to the 950 LOW beam - this was a piece of cake and there's lots of space.
On the 990 it's a bit more difficult
Here's a pictorial as to how I did it
(Adventurer has far more experience with this and can comment where he likes)
I first did the LOW beam
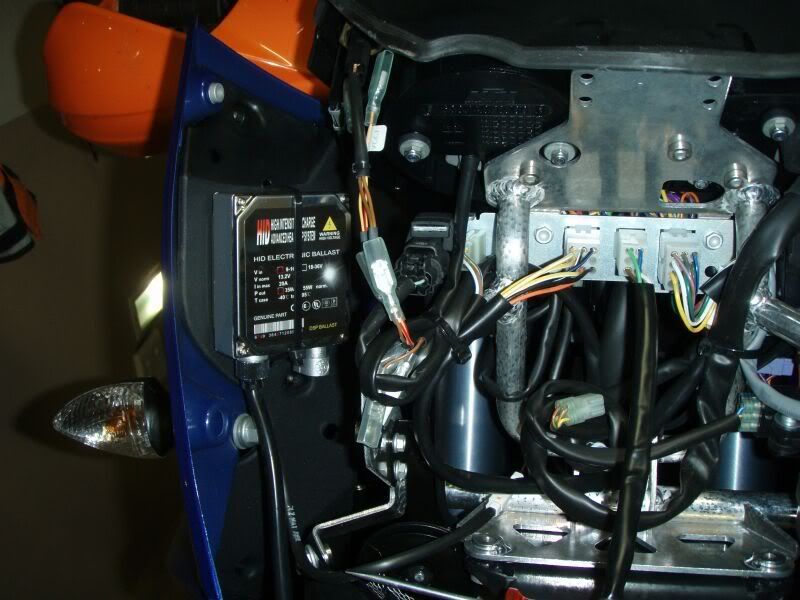
If you face the bike - the Ballast is mounted on the left side (right hand fairing)
Use the double sided tape provided - BUT definately secure with cable ties as shown

and a close-up
Should you only do the LOW beam - this is the easiest and most hassle-free
Fitting the HIGH beam presents a further problem - NO MORE SPACE
Now one has to get creative and thanks to ADV for the idea
Remove the left fairing completely
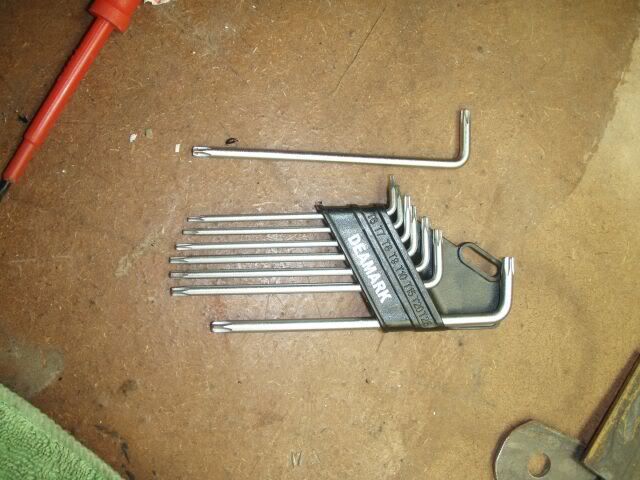
Now remove the moulded plastic inner using the following tool (preferrably the TORX and not ALLEN key)
The fairing now looks like this (set it aside on a soft cloth)
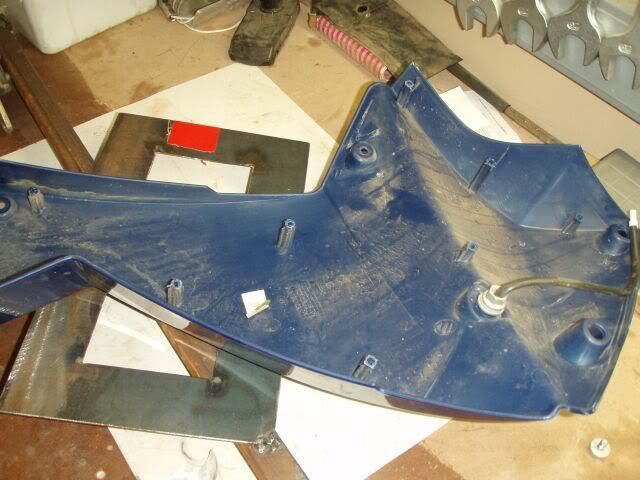
Turn the moulded plastic inner upside down and place ballast in place. Drill a hole (6mm) on all 4 sides. Stick the ballast down with a large piece of doubled sided tape and then secure with cable ties

This is what it looks like from the other side
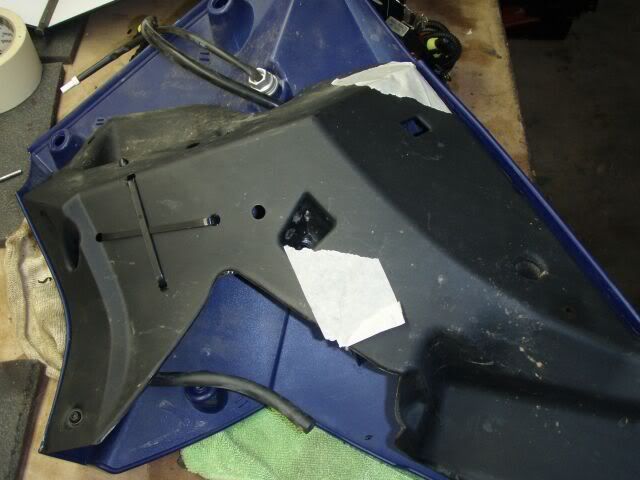
Note all the pieces of masking tape - This is where the screws are. It keeps them from getting lost and each screw goes back into it's original position
DO NOT FORGET to fit the plugs into the ballast at this stage (obviously depending on the type you buy)
Screw the moulded plastic back onto the fairing, taking care not to overtighten (see photo above)
Remove the rubber bung that covers the globe and remove the old globe and put in a safe place
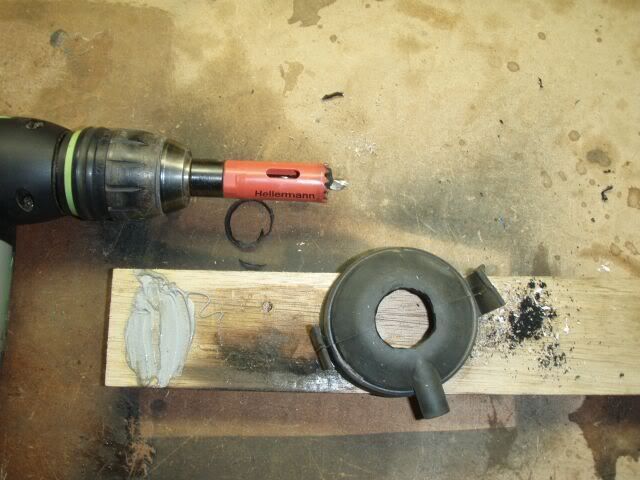
Now take a 25mm holesaw (or a pair of sidecutters). The holesaw in the pic is a 20mm one - it is too small. 25mm will work
Drill out the centre of the rubber bung that fits over the rear of the globe
The original wires come in through the side - this you can seal with silicone
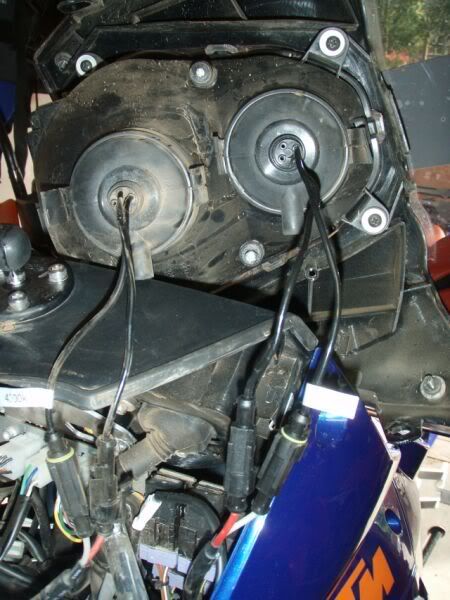
In the next pic you can see the LOW beam on the left and HIGH on the right
The original supply connects to the one end of the ballast and the other set of wires from the ballast go to the globe with the supplied rubber ring fitting in the hole you have just made.
The supply side to the ballast will be too long - cut off to the correct length and crimp on two spade connections. These new connections fit onto the original supply to the old globe
Ensure the polarity is correct by testing at this stage. Incorrect polarity and it will not work
Unfortunately I did not take too many pics - but I'm sure this will help
ENJOY !!
On the 990 it's a bit more difficult
Here's a pictorial as to how I did it
(Adventurer has far more experience with this and can comment where he likes)
I first did the LOW beam
If you face the bike - the Ballast is mounted on the left side (right hand fairing)
Use the double sided tape provided - BUT definately secure with cable ties as shown
and a close-up
Should you only do the LOW beam - this is the easiest and most hassle-free
Fitting the HIGH beam presents a further problem - NO MORE SPACE
Now one has to get creative and thanks to ADV for the idea
Remove the left fairing completely
Now remove the moulded plastic inner using the following tool (preferrably the TORX and not ALLEN key)
The fairing now looks like this (set it aside on a soft cloth)
Turn the moulded plastic inner upside down and place ballast in place. Drill a hole (6mm) on all 4 sides. Stick the ballast down with a large piece of doubled sided tape and then secure with cable ties
This is what it looks like from the other side
Note all the pieces of masking tape - This is where the screws are. It keeps them from getting lost and each screw goes back into it's original position
DO NOT FORGET to fit the plugs into the ballast at this stage (obviously depending on the type you buy)
Screw the moulded plastic back onto the fairing, taking care not to overtighten (see photo above)
Remove the rubber bung that covers the globe and remove the old globe and put in a safe place
Now take a 25mm holesaw (or a pair of sidecutters). The holesaw in the pic is a 20mm one - it is too small. 25mm will work
Drill out the centre of the rubber bung that fits over the rear of the globe
The original wires come in through the side - this you can seal with silicone
In the next pic you can see the LOW beam on the left and HIGH on the right
The original supply connects to the one end of the ballast and the other set of wires from the ballast go to the globe with the supplied rubber ring fitting in the hole you have just made.
The supply side to the ballast will be too long - cut off to the correct length and crimp on two spade connections. These new connections fit onto the original supply to the old globe
Ensure the polarity is correct by testing at this stage. Incorrect polarity and it will not work
Unfortunately I did not take too many pics - but I'm sure this will help
ENJOY !!